This command allows us to add lines, rectangles, ellipses or texts to a PDF. Their appearance and position can be configured.
The command is quite configurable and therefore complex. It has three tabs: "Object and position", "Fill" and "Stroke".
What is placed
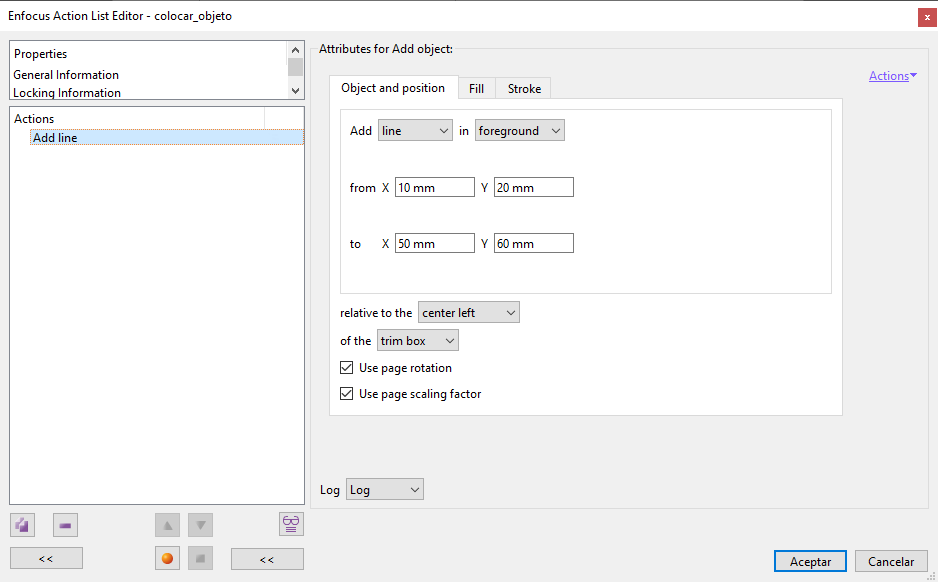
In the tab "Object and position" we choose which object to place and where.
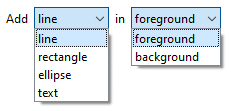
Four types of objects are available ("line", "rectangle", "ellipse" and "text"). They can always be placed with two options: ‘In the foreground’ (in front of what already exists) and ‘in the background’ (behind what already exists).
1. Lines
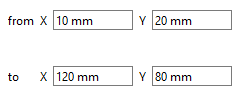
The object added will be a line from a point X1,Y1 to another point X2,Y2.
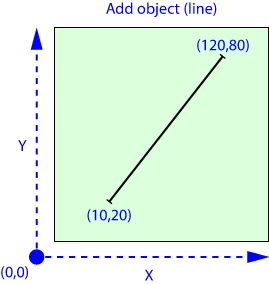
Negative and positive values are allowed (3, -3, etc...) . The usual PDF coordinates system is used, as shown in the diagram above.
2. Rectangles

The added object will be a rectangle with a "Width" and "Height" that the user can define in two ways:
- "
Use fixed value": The user can enter a value in any accepted unit of measure. - "
Use page box value": The rectangle will have the dimensions of a page box (which can be chosen). 

One of four "Corner Styles" (miter, rounded, inverse rounded and bevel) can be chosen. Its "Radius" can be specified (only one style is supported for the whole frame).
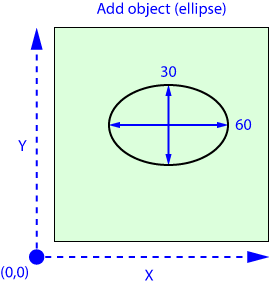
3. Ellipses
The options for placing an "Ellipse" are the same as for the "Rectangle" except that it is not possible to indicate a "Corner Style". The added object will be an ellipse with a "Width" and "Height" that can be defined by the user in two ways:
- "
Use fixed value": The user can enter a value in any accepted unit of measure. - "
Use page box value": The rectangle will have the dimensions of a page box (which can be chosen).
4. Texts

This fourth option is for texts that are written into the "Text" box. The user can write down fixed texts and combine them with a set of variables to be chosen by clicking on the "Variable" button.
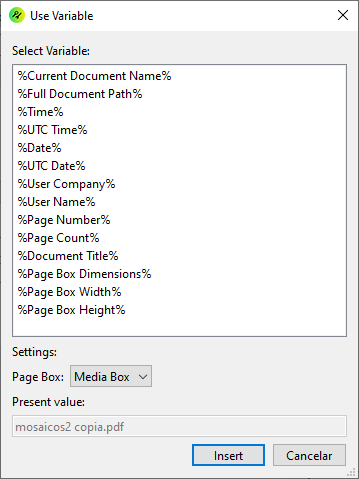
The available "Variables" are those shown in the above dialogue box:
%Current Document Name%: The name of the document (including extension).%Full Document path%: The full path to the location of the document in the system.%Time%: The time of the system at the time of execution of the action list, inhh:mm:ssformat.%UTC Time%: The UTC time of the system at the time of execution of the action list, inhh:mm:ssformat.%Date%: The date of the computer at the time of execution of the action list, in the format "Month day number, year"; for example: "June 6, 2024".%UTC Date%:
The Universal Time (UTC) date of the computer at the time of execution of the action list, in the format "Month day number, year"; for example: "June 6, 2024".%User Company%: The company name under which the copy of pitStop is registered.%User Name%: The name of the user the copy of PitStop is registered to (it does does not have to be the same the user of the system using the programme).%Page Number%: The number of the page the text is placed on, in relation to the total of pages of the document (no other numbering is taken into account).%Page Count%:The total number of pages of the document.%Document Title%: The title of the document.%Page Box Dimensions%: The dimensions (width × height) of a page box, selectable when choosing the variable is chosen.%Page Box Width%: The width of a page box, selectable at the time of choosing the variable.%Page Box Height%: The height of a page box, selectable at the time of choosing the variable.
For example, if we wanted to add on each page an annotation with the name of a PDF document called "prime_numbers.pdf" and the page number of the total number of pages, we would say: "%Document Title%. (%Page Number% of %Page Count% pages)", and in page 6, the resulting text would be: "prime_numbers.pdf. (Page 6 of 675 pages)".
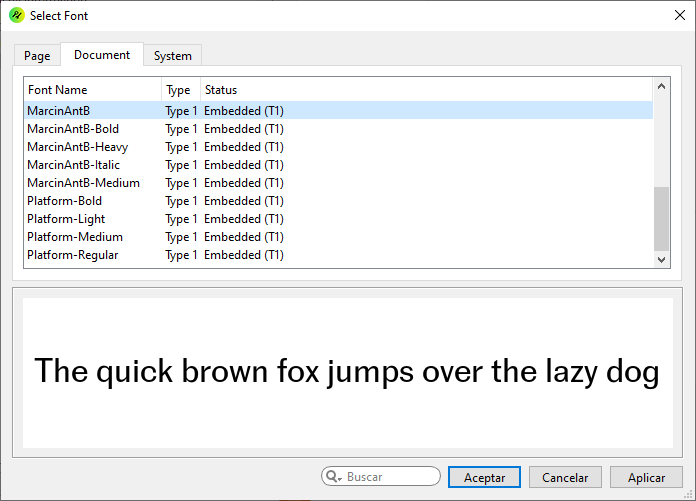
The font of the text we want to add can be selected clicking on the "Font" button, which allows us to access the "Font Selector". In addition, we can indicate the "Size" of the text.
Warning: This action does not allow line breaks, so the text is a single line. This is why it is important to choose carefully the sizes and the specific texts to be used.
How objects are places
The placement options depend on the type of object chosen. Lines are placed with certain parameters, rectangles, ellipses and texts with others:
Placement of lines
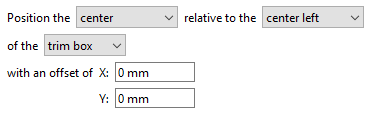
We can have the first point (the point "X1 , Y1") placed relative to one of nine possible points in the page box of our choice.
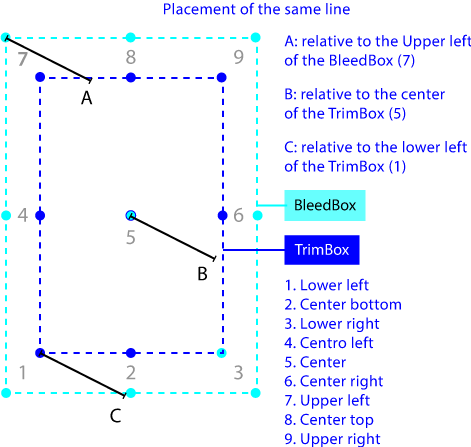
Above we can see an example of three different possibilities for the placement of the same line.
Warning: When placing the line, both points are placed as if the chosen placement location (e.g. ‘centre left’) were the coordinates "0,0" (bottom left corner in the PDF coordinates system) and from there, they are offset as requested by the user.
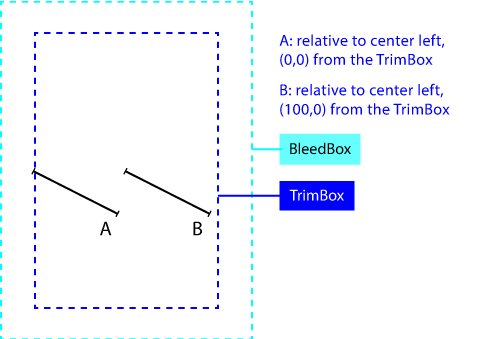
For example: In the image above, line A has as point "X1,Y1" the values "0,0" while line B has "100,0" and both are placed "Relative to the left centre" of the TrimBox.

Besides, we can select "Use page rotation" and "Use page scaling factor" as non-mutually exclusive options. If we do not check them, the rotation or resizing factors that may exist will be ignored.
Placement of rectangles, ellipses and texts
Placement of rectangles, ellipses and text is similar to that of lines.
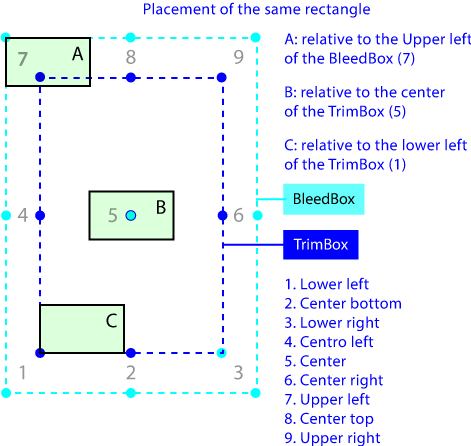
Above there is an example of three placements of the same rectangle.
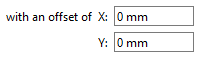
The positioning coordinates can be tweaked with a user-selectable "Offset" (always following the PDF coordinate system).

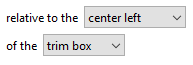
For example: In the image above, rectangle A has the values "0" and "0" as "Offset" , while rectangle B has "100" and "-50", both placed "Relative to the center left" of the TrimBox.
Fill and stroke
These two tabs contain the options to give a "Fill" or "Stroke" colour to the placed object.
Fill
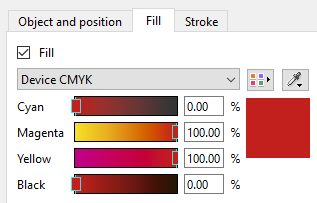
This "Fill" option allows us to choose a colour space to be applied as a fill to the placed object.
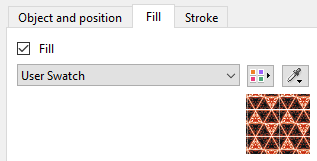
Only device colour spaces and calibrated grey and RGB are supported (ie: can be chosen), but if we use the "Eyedropper" to select a colour space defined with a colour profile or mosaic pattern, for example, we can bypass this limitation and choose almost any type of colour space.
Warning: The "Fill" option is not active if the placed object is a "Line".
Stroke

This "Stroke" option allows us to assign a colour of our choice to the stroke of the placed object. We can as well give a "Weight" (thickness) to it besides a colour.
The limitations of selectable colour spaces are the same as for the "Fill" option and can be circumvented too using the "Eyedropper" in the same way.
[© Gustavo Sánchez Muñoz, 2026] Gustavo Sánchez Muñoz (also identified as Gusgsm) is the author of the content of this page. Its graphic and written content can be shared, copied and redistributed in whole or in part without the express permission of its author with the only condition that it cannot be used for directly commercial purposes (that is: It cannot be resold, but it can form part as reasonable quotations in commercial works) and the legal terms of any derivative works must be the same as those expressed in this statement. The citation of the source with reference to this site and its author is not mandatory, although it is always appreciated.