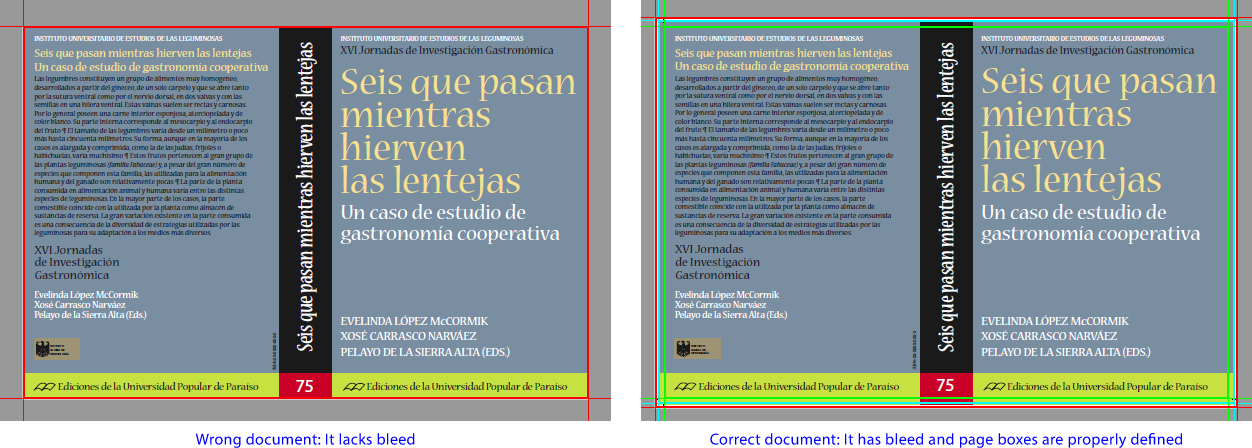
This is the sixth example of how to create an action list. In this case, we are going to modify an erroneous document to add bleed and crop marks. It is a 148 × 215 mm book with a 30 mm spine with 3 mm of bleed missing (one of the most common errors in printing).
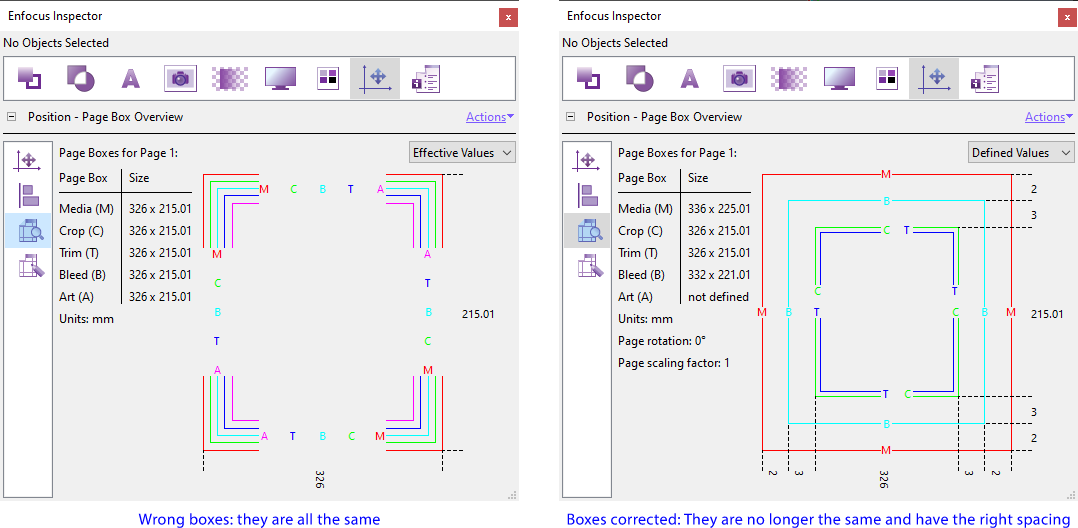
This error can be seen with PitStop's "Inspector", where the original page boxes have all been left with the same dimensions.
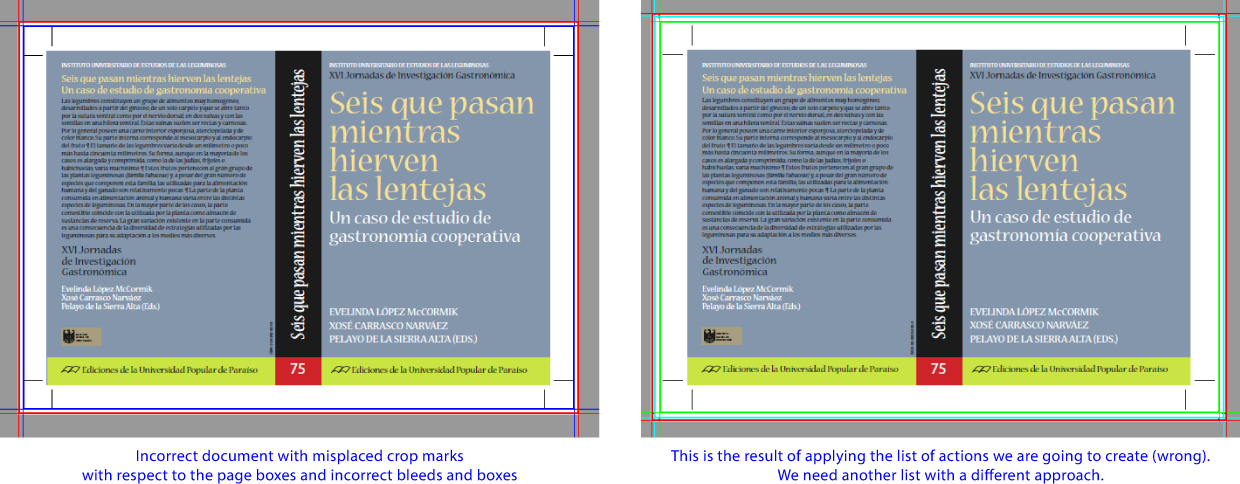
Warning: For other cases where, for example, the document size has been defined incorrectly (paper size too big and wrongly defined crop marks), this action does not work. We should use a different action list, with a different approach.
This is where the value of using PitStop Server instead of PitStop as an Acrobat plugin can be appreciated. The server version is able to use an automated working system with conditional movement of documents, depending on their qualities, sending them to one list of actions or another.
The steps of the list
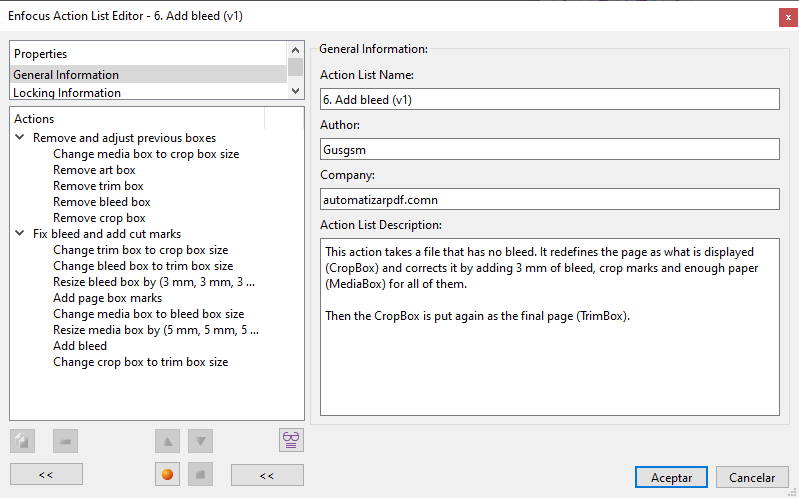
The first thing is fixing the paper size MediaBox and deleting the other page boxes in the document. We do this to avoid problems were other boxes incorrectly defined. We put these actions together in a group called "Remove and adjust previous boxes".
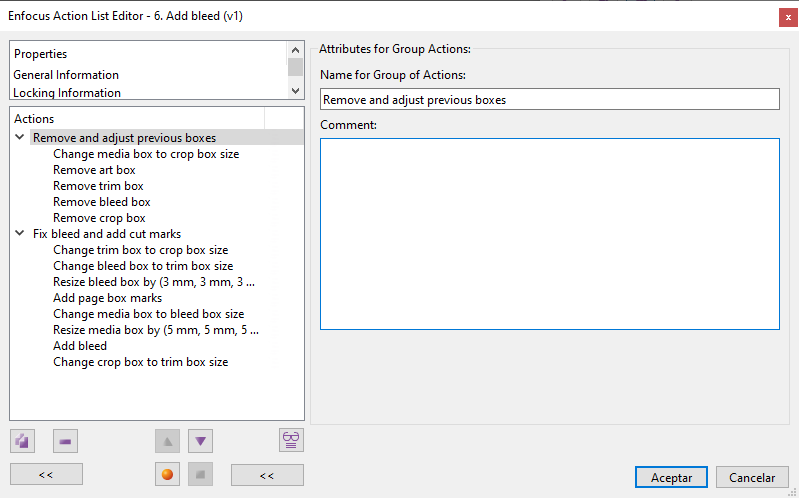
Then, in a second group of actions called "Fix bleed and add trim marks" we adjust the size of the final printed page (two pages plus spine) (TrimBox here is the full covers of the book) to the size of the paper (MediaBox), we add a bleed box (BleedBox), we add crop marks, we enlarge the size of the media box (MediaBox), we add the necessary bleed, and then we crop what is displayed on screen (CropBox) so that we only see the finished document (TrimBox).
Warning: The use of the "Group actions" operator is not mandatory but we do it to make it easier to analyse possible failures while building the list and to be able to reuse some parts in other lists more easily. If you prefer not to use it, that's fine.
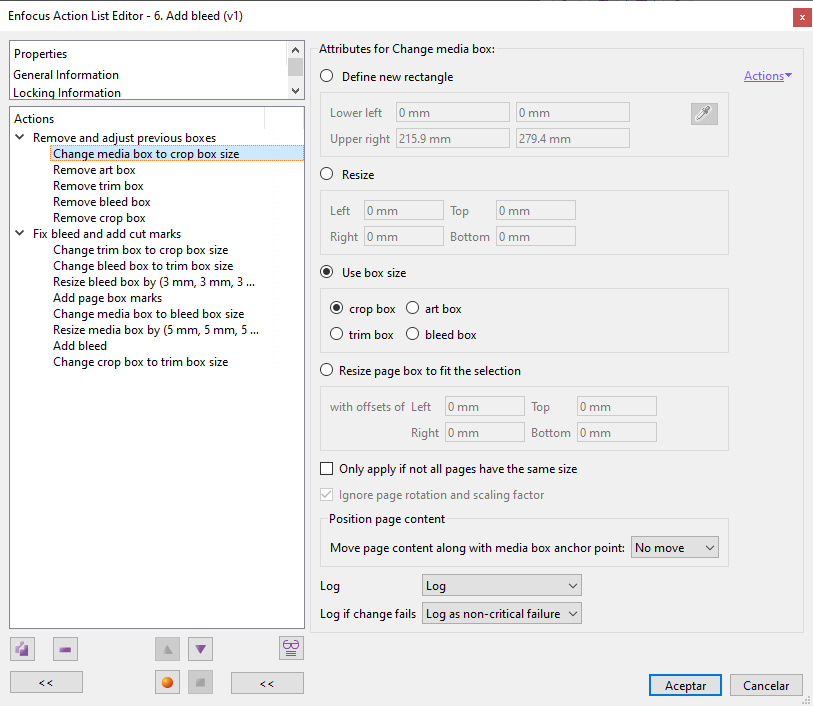
"Change MediaBox". Here we redefine the paper size (MediaBox, the only essential box in a PDF). We resize it as the CropBox, which is what we see on the screen (which matches with what the final result should be once the bleed has been trimmed).
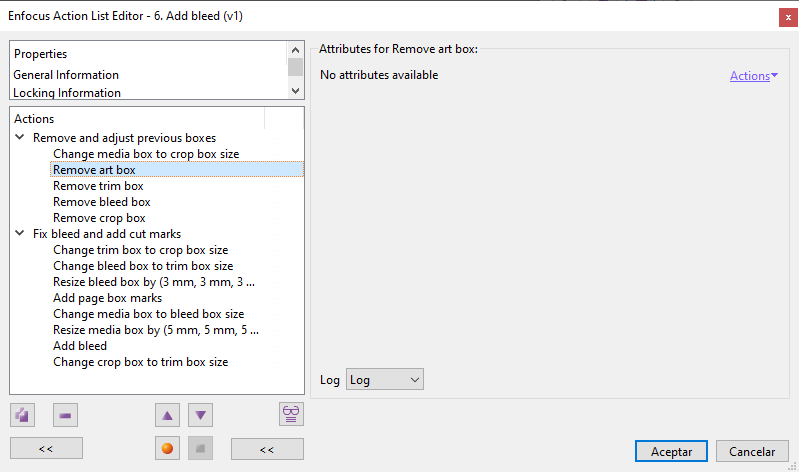
Now we delete all the other boxes in case the creators set them unproperly (the order of removal is irrelevant):
We group all the above steps into a "Group of actions" called "Remove and adjust previous boxes".
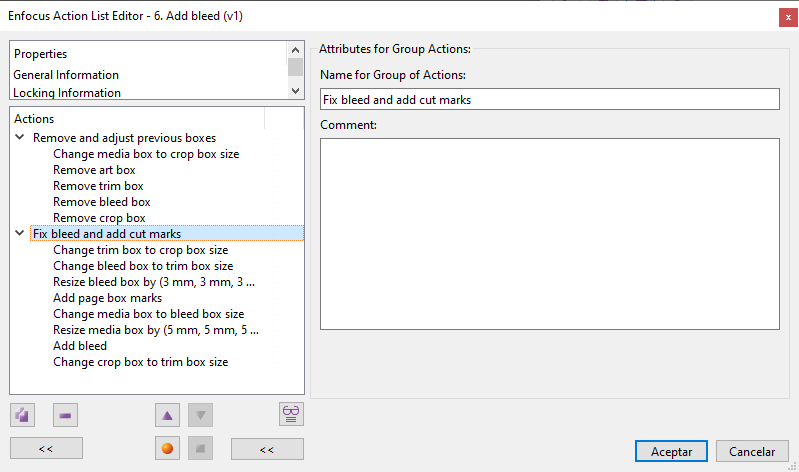
Now, we create a second "Group of actions" called "Fix bleed and add trim marks" and we gather the remaining actions in the list there.
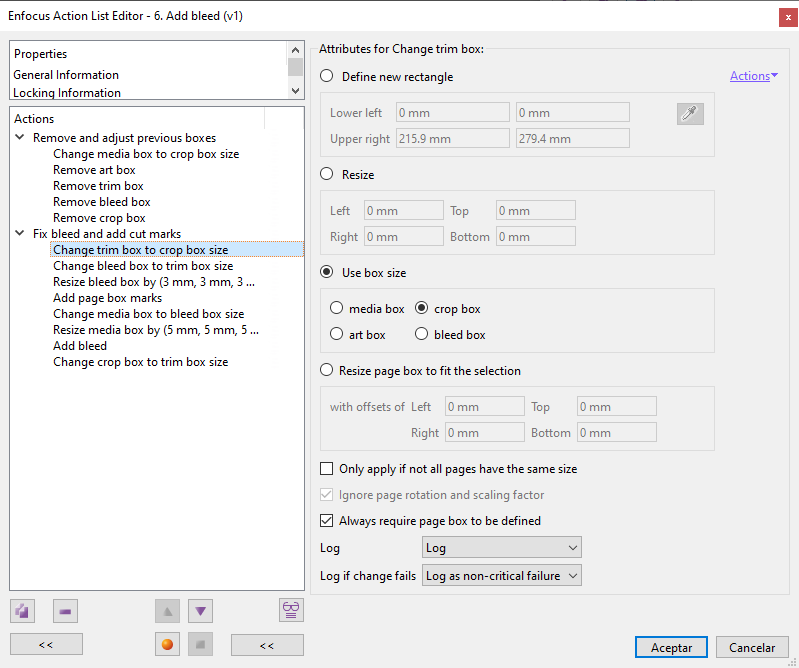
"Change TrimBox to CropBox size". Now we define a new TrimBox by giving it the size of the CropBox.
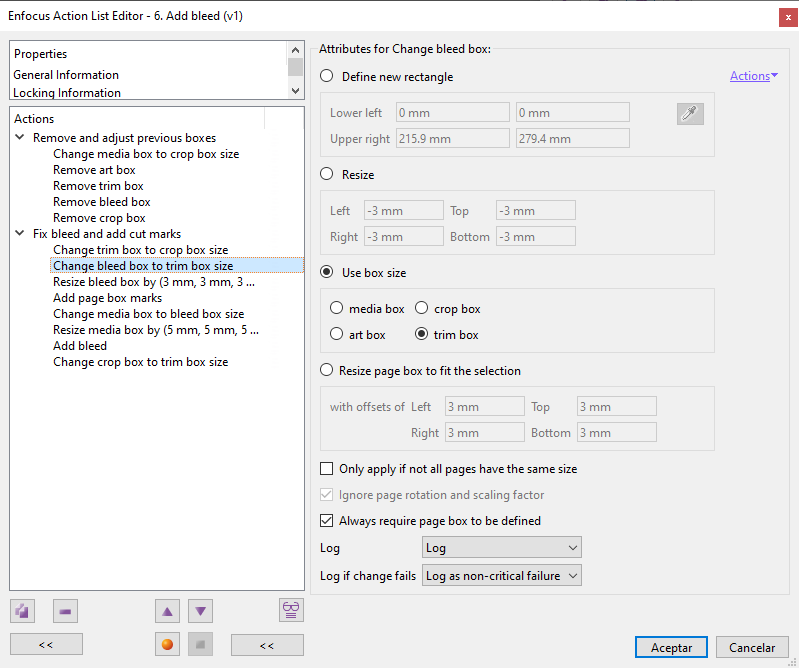
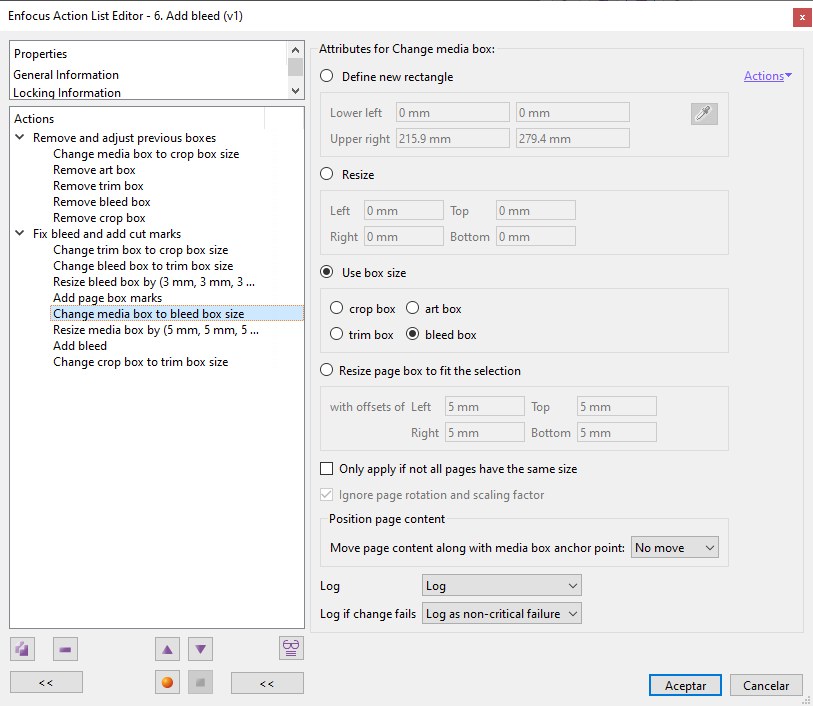
"Change BleedBox to TrimBox size". Next we add a BleedBox, which receives the same size as the TrimBox.
Warning: We do this because usually we cannot create a page box with the size we want directly, but we have to do it in two steps: First we create the box with the same size as an existing box, correctly sized, and, in a second step, we modify it with the "Resize" option.
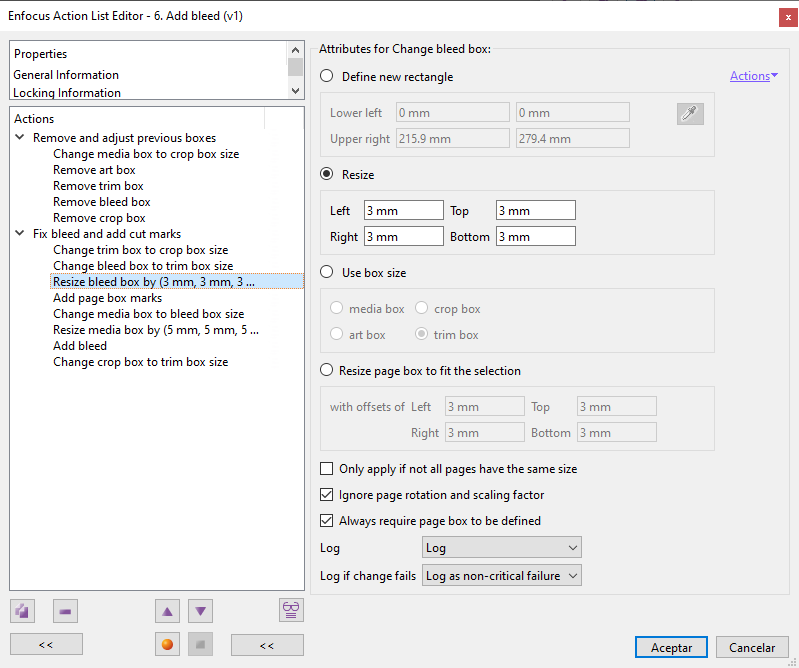
"Resize BleedBox 3 mm.". Once the BleedBox is defined, we can redefine its size by "resizing" it by 3 mm on all sides. Now we have the two essential boxes (TrimBox and BleedBox) defined with the correct size.
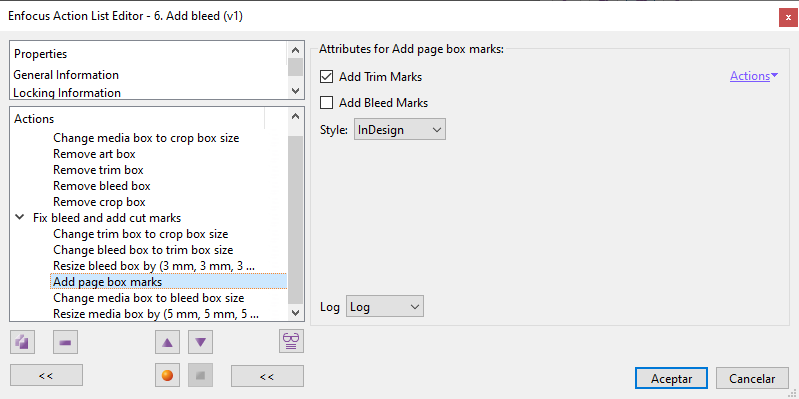
"Add page box marks". Now, we add some "Crop Marks" ("InDesign Style"). It is not essential but many printers ask for themt, so we add them.
"Change MediaBox to BleedBox size". We give the paper (MediaBox) the size of the BleedBox to modify it in a second step.
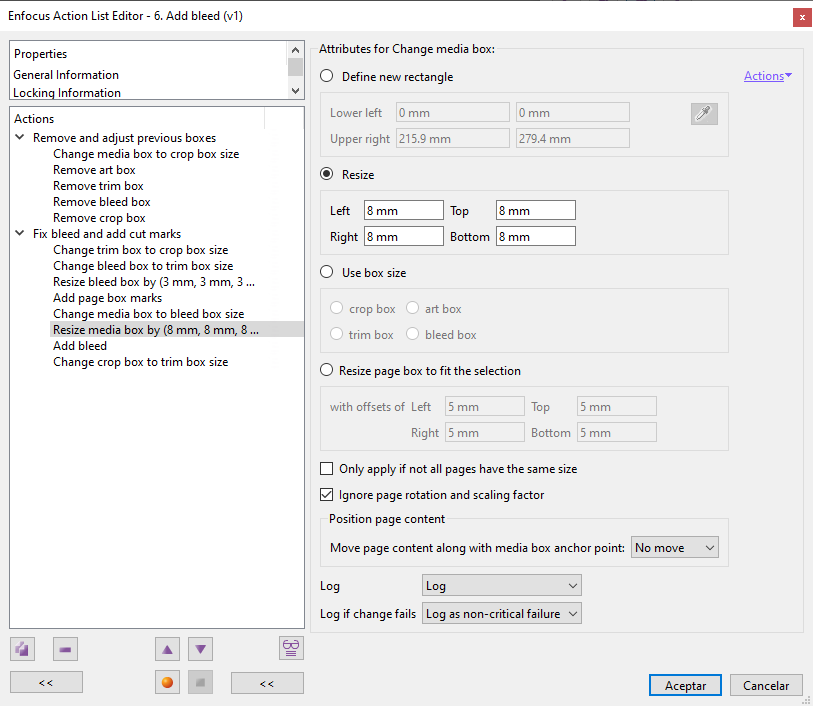
"Resize MediaBox 8mm.". In this second step, we redefine the size of the MediaBox by "resizing" it "8 mm." on all sides. We do this in order to fit the trim marks without problems.
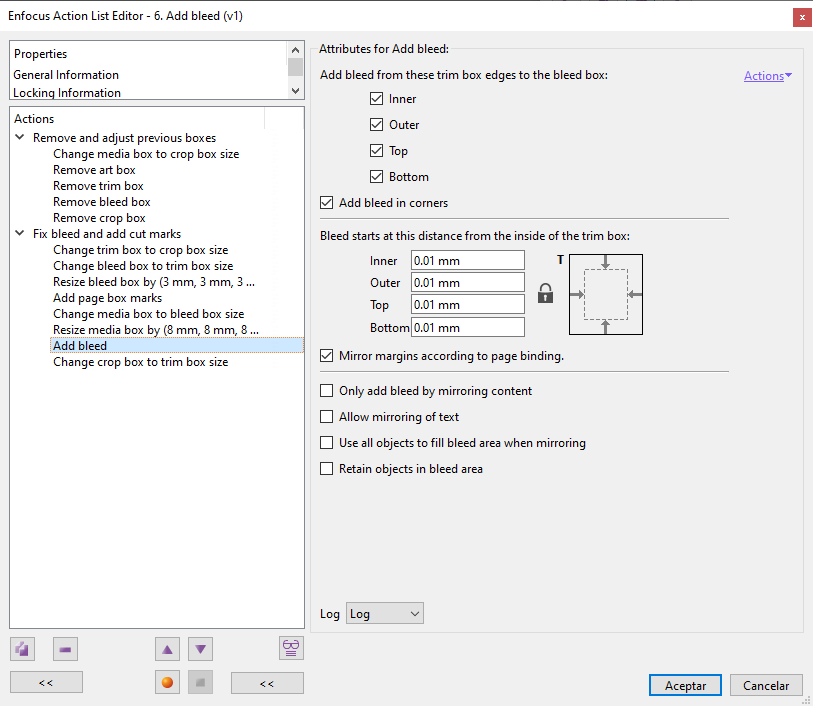
"Add bleed". Now we include the command that will add the corresponding bleed by extending the backgrounds, layouts or images as necessary. Remember that for this command to take effect, the TrimBox and BleedBox must be defined and that they must have some difference in size between them (in this case, they must have 3 mm difference on all sides).
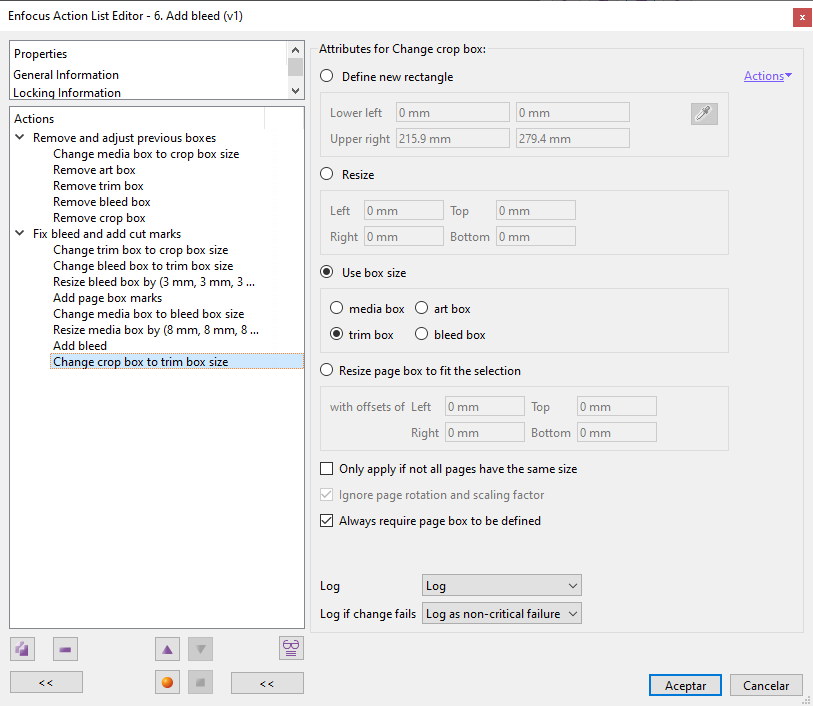
"Change CropBox to TrimBox size". This last step is not really needed. What we are going to do is to return the display on the screen CropBox to what we saw at the beginning, that is: the final size of the document is once trimmed (the TrimBox).
Conclusion
This is one way of creating a list of actions for this purpose, but it is not the only one. As long as the system is not overloaded, the best will always be the most flexible and simplest one. Sometimes, the difference between one method and another is marginal and we should overthink about it.
In this link you can download the list of actions described in this page to understand how it works (any damage or inconvenience it may cause is your responsibility, not the creator's. The list is provided as is and is password protected against any alteration, but it can be opened and examined).
[© Gustavo Sánchez Muñoz, 2026] Gustavo Sánchez Muñoz (also identified as Gusgsm) is the author of the content of this page. Its graphic and written content can be shared, copied and redistributed in whole or in part without the express permission of its author with the only condition that it cannot be used for directly commercial purposes (that is: It cannot be resold, but it can form part as reasonable quotations in commercial works) and the legal terms of any derivative works must be the same as those expressed in this statement. The citation of the source with reference to this site and its author is not mandatory, although it is always appreciated.